Do you have lots of vegetable peelings, used tea bags and chicken wire?
You must have been told several times before, “Add your vegetables scraps to your compost pile.”
If you’ve been sitting on the fence, hesitating over the purchase of a compost bin, hesitate no further…
Read on and find out how to make a chicken wire compost bin. It’s super easy and cheap and you end up with gardeners gold in a couple of months…
I promise!
WHAT YOU NEED
Chicken wire
Try and find galvanised chicken wire. The iron or steel wire is protected with a layer of zinc, this stops any rust forming onto the wire and will make your compost bin last much longer.
Protective gloves
This is a must because the wire is extremely sharp!
You may experience some wrestling with the wire, especially because it will try to curl back to its packaged tight shape after you unravel it.
Wire cutters
You need sharp cutters to snip off any excess and to cut your own wire ties to the correct length.
A wooden stake
This is optional to help keep the compost bin supported and close to the ground.
If you don’t have anything to substitute as the wooden stake, don’t worry because you can still make the compost bin without it. If you don’t use a wooden stake, make sure you sit the bottom prongs of the chicken wire into the ground for extra support.
Tip: Cut the end of the wooden stake into a point, this makes it much easier to insert into the ground.
Sturdy wire or twine
This is also optional. If your chicken wire came with extra wire wrapped around the roll to hold it together, you can use this to tie the wire to the wooden stake. If you don’t have any extra wire, thick sturdy twine or string is just as good.
Remember: Stay away from zip ties, you want to be able to open up the compost bin when it is ready to be harvested.
STEP 1 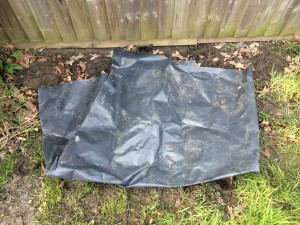
Decide how big you want your compost bin to be, and choose a suitable location in your garden. Make sure the location of your compost bin is accessible and isn’t placed in the shade.
You may be surprised, but you can keep the compost bin on your patio or on a concrete floor. The compost critters such as worms and bugs that are necessary to break down your kitchen scraps will find their way to your bin.
Start preparing the ground, lay cardboard or an opaque material on top of the area of where your compost bin will be. The opaque material will prevent any weeds and grass from growing underneath. Leave the material in the same place for a week, or until the plant life underneath has turned brown and died.
Tip: Short for time? You can pull up the weeds manually, just make sure the roots are lifted out of the ground.
STEP 2 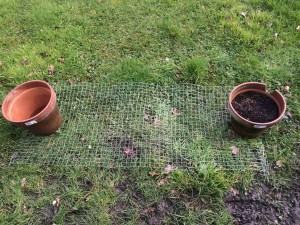
Remove any outer packaging and remove the chicken wire carefully. If the wire has extra support wire wrapped around, keep this aside for reuse later.
Lay out the chicken wire curl side up on the ground and place 2 heavy objects on both ends. This helps the wire stretch and prevents it from curling tightly when you try to mould the final shape.
STEP 3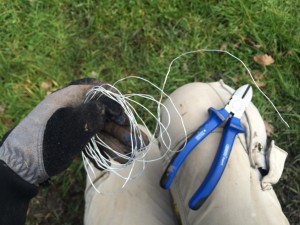
Prepare the support wire or string by cutting x3 3″ long pieces. The number of ties and length you need will depend on the thickness of your chicken wire; how tall you choose the bin to be and if you use a wooden stake. Keep in mind, the wire ties need to be long enough to wrap around the stake and loop through the wire to support the wooden stake to the compost bin.
STEP 4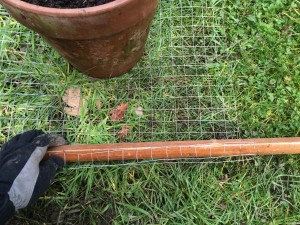
Lay your wooden stake or similar material at one end of the chicken wire. Allow 2″ of the wooden stake to extend beyond the chicken wire. This 2″ section will be inserted into the ground. Take a look at the image to get a picture of what I mean. If you choose to carve a point into your wooden stake, make sure this end is the 2″ extension.
STEP 5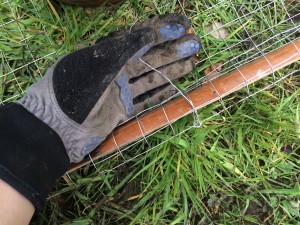
Hold the end of the wire and wooden stake tightly, slowly roll them forward until the wooden stake is tightly wrapped with chicken wire.
Begin wrapping the wire tires around the wooden stake and loop twice through the chicken wire. Knot the ends and twist any remaining wire together and push inwards to where the centre of the bin will be. It is important that no wire sticks out, otherwise, this could cause an injury.
I used 3 wire ties, one in the middle and at both ends of the wooden stake.
STEP 6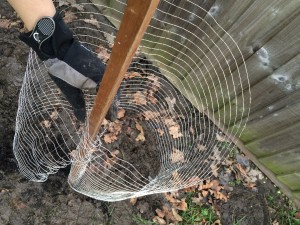
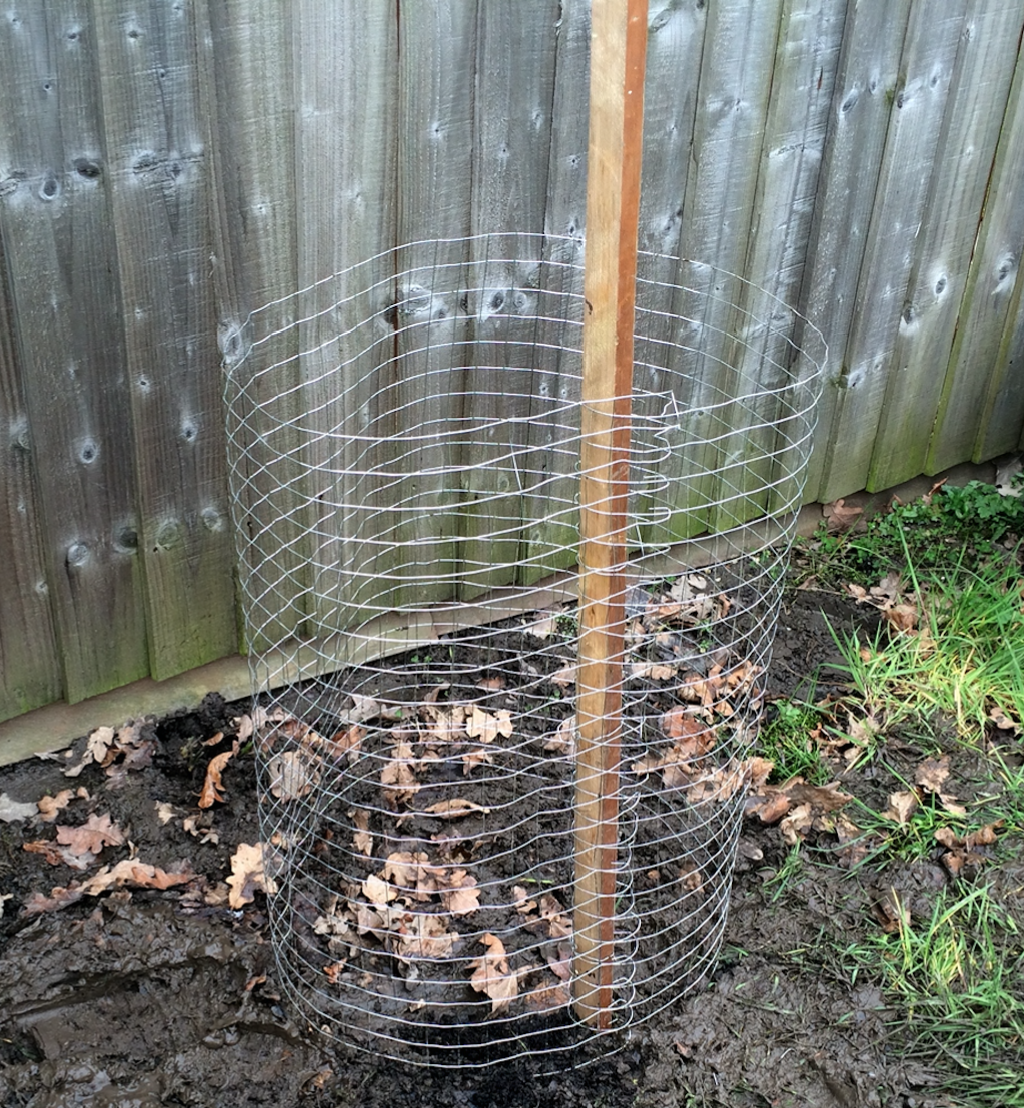
Carefully pick up the chicken wire and wooden stake by pulling the wire out and away from you. The wire may try to curl around and you don’t want to injure yourself.
Push the wooden stake into the ground until the bottom of the chicken wire touches the ground. You may need a mallet and an extra pair of hands for this.
Fold the chicken wire into your desired shape and trim off any excess you don’t need.
STEP 7
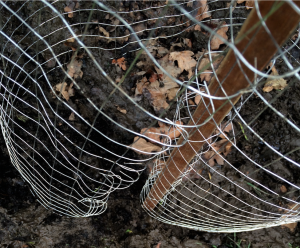
Overlap the end of the chicken wire onto the wire to the right of the wooden stake, secure the closure with extra wire if needed. On the photograph, you see that prongs at the end of my chicken wire curl in slightly. I bent the prongs around the chicken wire for a secure fit.
When you have secured the outer edge of the chicken wire, stand back and admire your new compost bin.
You may need to make a couple of adjustments to achieve the desired shape of your compost bin.
VARIATIONS TO THE CHICKEN WIRE COMPOST BIN
1. If you don’t use a wooden stake, you may find it easier to mould the shape of your compost bin when the chicken wire is laid out on the floor.
2. If you have a problem with rodents or curious pets, you can make a chicken wire lid that rests directly on top of the bin. To secure the lid down, slide the wooden stake through a square of chicken wire. You may need to cut out a window in the top that is big enough for the wooden stake to fit through.
If you are lucky enough to get hold of used chicken wire, you could make your own chicken wire compost bin for free.
What if you don’t have access to a garden?
Well, why not try the indoor version?
You can make your own worm bin that is discreetly kept out of view. If this sounds more like your thing, [click here] to view Leafeco’s instructional video that explains the hows and whys or a DIY worm bin.
And there you have it, how to make a chicken wire compost bin.
If you made your compost bin with the above method, I would love to see how it turned out. Take a photograph and share it on the Leafeco Facebook page. [click here]